Best Fencing Installers: Texas Fence
We’re here to demystify the often-misunderstood world of fencing installers. While some might view fencing as simply placing posts and panels in the ground, one understands it’s an intricate blend of skills, knowledge, and precision that transforms ordinary boundaries into lasting property assets. As seasoned experts in the field, we will walk you through what separates qualified fencing installers from weekend warriors, and why proper installation makes all the difference between a fence that stands strong for decades and one that’s destined for premature replacement.
Key Points
- Professional fencing installers provide expertise in proper post installation, concrete work, and material selection for durable fence construction.
- Licensed contractors ensure compliance with local building codes, obtain necessary permits, and avoid underground utility conflicts.
- Installers use specialized tools and equipment to efficiently dig holes, set posts, and secure fencing materials.
- Experienced fence contractors offer various fencing options including wood, vinyl, chain-link, and metal installations.
- Professional installation services include project planning, accurate measurements, timeline estimates, and quality workmanship guarantees.
Essential Skills for Fence Installation
Several essential skills form the foundation of professional fence installation work. We require robust mathematical abilities to calculate measurements, angles, and material quantities precisely. Our expertise must include proper post-hole digging techniques, concrete mixing ratios, and an understanding of soil types and drainage patterns. We must master the use of critical tools like post-hole diggers, levels, measuring devices, and power tools such as augers and drills. It’s indispensable that we understand local building codes, property boundaries, and utility line locations before starting any installation. We’ll also need physical strength and stamina to handle heavy materials and work in various weather conditions. Technical knowledge of different fencing materials is pivotal – whether we’re working with wood, vinyl, chain-link, or wrought iron. Each material requires specific installation methods and hardware. We must be skilled at reading blueprints and technical drawings to guarantee accurate fence layout and positioning. Problem-solving abilities help us navigate unexpected challenges like uneven terrain or obstacles. Finally, we need excellent communication skills to coordinate with clients, team members, and inspectors throughout the project. Professional fence installation ensures proper installation techniques and compliance with building codes, enhancing the quality and durability of the fencing work.
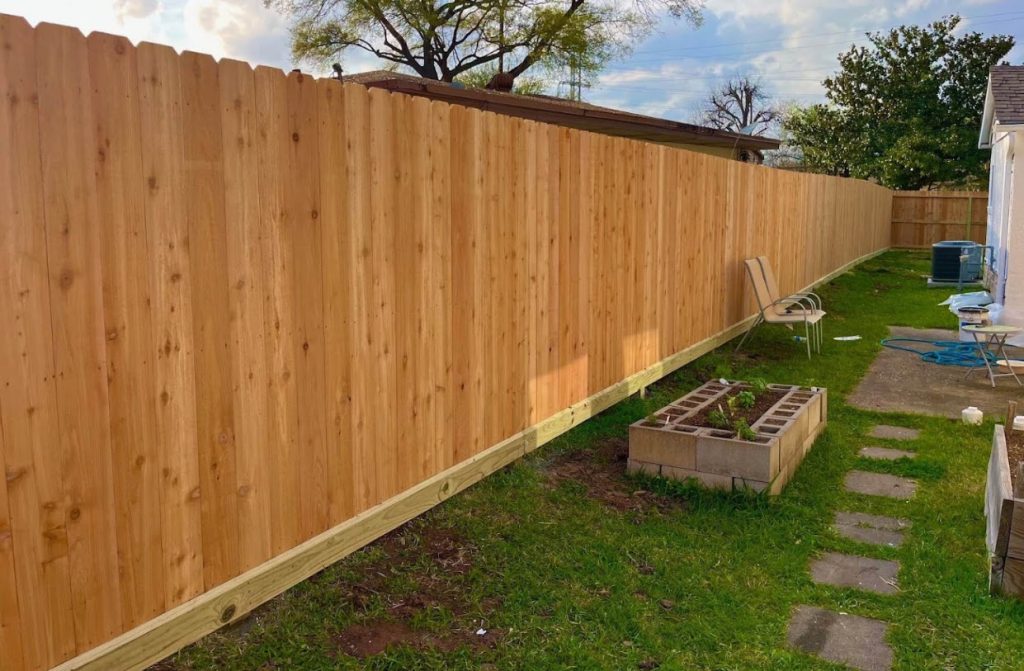
Types of Fencing Materials
We’ll explore today’s most popular fencing materials, including wood, vinyl, chain link, and wrought iron.
Each material offers unique benefits, from wood’s classic appeal and affordable price point to vinyl’s low maintenance and aluminum’s rust resistance.
Understanding how these materials perform in different weather conditions – like wood’s susceptibility to moisture damage versus metal’s durability in harsh elements – will help you make an informed choice for your property. Pressure-treated pine is highly resistant to rot, decay, and insects, making it a durable and cost-effective fencing option.
Common Materials and Costs
When planning a fence installation project, understanding the various materials available and their associated costs is critical for making an informed decision. We’ll explore the most common fencing materials and their typical price ranges to help you budget effectively.
Let’s examine the primary fencing materials and their costs per linear foot (which can vary based on suppliers), including both materials and professional installation:
| Material Type | Average Cost Range (per linear foot) |
|---|---|
| Wood | $20 – $50 |
| Vinyl | $30 – $50 |
| Chain Link | $15 – $30 |
| Wrought Iron | $50 – $85 |
We’ve found that wood fencing remains the most economical choice, with pressure-treated pine being particularly cost-effective. Vinyl offers excellent durability and minimal maintenance, justifying its higher initial cost. Aluminum provides a perfect balance of strength and affordability, while wrought iron, though expensive, delivers unmatched elegance and longevity.
Remember that these costs can vary greatly based on factors like geographic location, material quality, fence height, and terrain complexity. We recommend getting multiple quotes from local installers to guarantee you’re receiving competitive pricing for your specific project.
Durability and Weather Resistance
Different fencing materials exhibit varying levels of durability and weather resistance, which directly impacts their longevity and maintenance requirements. We’ll explore how common fencing materials stand up to the elements and what you can expect from each option.
Vinyl fencing offers exceptional weather resistance and won’t rot, rust, or decay. It’s immune to insect damage and maintains its appearance for 20-30 years with minimal maintenance.
Metal fencing varies in durability: aluminum won’t rust and requires little upkeep, while wrought iron needs regular rust prevention but can last generations when properly maintained.
Wood fencing’s durability depends largely on the species and treatment. Cedar and redwood contain natural oils that resist decay and insects, while pressure-treated pine requires periodic sealing but resists ground contact deterioration. We recommend considering composite fencing if you want wood’s appearance with enhanced durability – it withstands moisture, won’t splinter, and typically carries 20-25 year warranties.
Chain-link fencing with galvanized or vinyl coating resists rust effectively and can last 20+ years. For maximum longevity in coastal areas, we suggest choosing either vinyl or aluminum, as they best withstand salt air exposure.
Tools and Equipment
Successful fence installation requires an extensive set of specialized tools and equipment to complete the job efficiently and safely. We’ll need basic hand tools like post hole diggers, shovels, levels, measuring tapes, and marking tools to lay out and start our fence line. Power tools such as augers, circular saws, and impact drivers speed up our work considerably and guarantee precise cuts and secure fastening.
For concrete work, we’ll use mixing tools, wheelbarrows, and cement finishing equipment. When working with metal fencing, we need metal cutting tools, welding equipment, and grinders. Let’s not forget safety equipment – we always use work gloves, safety glasses, steel-toed boots, and ear protection when operating power tools.
Additional equipment we’ll want on hand includes string lines for maintaining straight runs, specialized post levelers, mechanical post drivers for certain soil types, and material handling equipment like dollies and trucks for transporting heavy materials. We’ll also need layout tools such as transit levels or laser levels for ensuring proper grading across sloped terrain. Specialty tools for specific terrains can add unexpected expenses during the installation process.
Site Preparation Guidelines
Proper site preparation involves six essential steps before any fence installation can begin. We’ll need to locate property lines, contact utility companies for marking underground services, and clear vegetation from the fence line.
Next, we’ll grade the area to guarantee proper drainage and establish a level working surface. Using marking paint or stakes, we’ll create a precise layout that follows property boundaries and local regulations.
Before breaking ground, let’s review these critical measurements:
- Post hole depth should equal 1/3 of the total post height plus 6 inches for gravel drainage
- Distance between posts must match your fence type specifications, typically 6-8 feet
- Gate post holes require additional depth and concrete for stability
We’ll then remove any existing fence materials, rocks, or roots that could interfere with the new installation. Finally, we’ll verify that our site preparation satisfies local building codes and HOA requirements. This careful preparation guarantees a sturdy foundation for your fence and prevents costly mistakes or legal issues down the line. Remember, thorough site preparation is the key to a successful, long-lasting fence installation.
Professional Installation Techniques
We’ll need to gather essential tools like post hole diggers, levels, string lines, and concrete mixing equipment before beginning any professional fence installation.
When securing posts, we’ll guarantee proper depth according to fence height and soil conditions, typically setting them at least 2 feet deep with a concrete foundation that extends above grade level to ensure water pooling doesn’t occur. It’s crucial to thoroughly mix the concrete to avoid dry spots and ensure the fence’s stability and durability.
Our installation methods must strictly adhere to local building codes, including property line setbacks, height restrictions, and specific requirements for pool fencing or other specialized applications.
Proper Tools and Equipment
In accordance with industry standards, professional fence installation requires an extensive set of specialized tools and equipment. We’ll need both power tools and hand tools to guarantee, ascertain, certify precise, durable installations that meet our clients’ expectations. Our essential power equipment includes post hole diggers, augers, levels, and impact drivers, while our hand tools comprise measuring tapes, shovels, and specialized fence pliers.
We always make certain, verify, confirm we’re equipped with these critical items for every installation:
- Safety gear including work gloves, safety glasses, steel-toed boots, and high-visibility vests
- Post-setting materials such as concrete mix, gravel, and specialized quick-set compounds
- Layout tools including string lines, marking paint, and grade stakes
When we’re working with specific fencing materials, we’ll need additional specialized equipment. For chain link installations, we’ll require tension bars and fence stretchers. Wood fence projects call for circular saws and drill bits, while vinyl fencing demands specific cutting tools and rubber mallets. We’ve learned that having the right tools not only makes our work more efficient but also guarantees, ensures, validates we deliver the professional results our clients deserve.
Securing Posts Correctly
Armed with our professional tools, we now focus on the bedrock of fence installation: securing posts correctly. We’ll start by marking our post locations precisely, ensuring they’re properly spaced and aligned. Let’s dig our post holes at least 24 inches deep, or below the frost line in colder climates, making them three times the width of our posts.
For pivotal stability, we’ll place about 6 inches of gravel at the bottom of each hole for drainage. We’ll then position our posts, using a post level to confirm they’re perfectly plumb on all sides. While one of us holds the post steady, let’s pour our concrete mix, maintaining a ratio of one part cement to two parts sand and three parts gravel. We’ll fill to about 3-4 inches below ground level.
As our concrete sets, we’ll continuously check our posts with levels and string lines to sustain perfect alignment. Let’s brace each post temporarily with 2x4s to prevent movement during the 24-48 hour curing period. Remember, we’re not rushing this fundamental step – proper post installation determines the longevity and stability of our entire fence.
Following Local Building Codes
Before proceeding with any installation work, local building codes must guide our entire fence project. We’ll need to obtain proper permits and understand specific requirements for height restrictions, setback distances, and material specifications. It’s essential that we verify zoning regulations and any homeowner association rules that might affect our installation plans.
When following building codes, we must pay attention to these critical requirements:
- Property line setbacks – Most municipalities require fences to be set back a specific distance from property lines, typically ranging from 2 to 8 inches depending on local ordinances
- Height restrictions – Residential areas often limit fence heights to 6 feet in backyards and 4 feet in front yards, with special provisions for corner lots
- Post depth specifications – Building codes usually mandate minimum post depths based on frost lines and soil conditions
We’ll also need to guarantee our installation meets safety standards for gate placement, structural integrity, and wind load requirements. Let’s check with local utilities for underground service locations and maintain proper clearances from utility boxes. By following these codes carefully, we’ll avoid costly corrections and potential legal issues while confirming our fence meets all compliance standards.
Common Installation Challenges
Professional fence installers regularly face a variety of challenging situations that can complicate even routine installations. We often encounter underground utilities, tree roots, and rocky soil conditions that require careful planning and specialized equipment. Steep grades and uneven terrain present additional complexities, forcing us to adjust our installation techniques to maintain proper fence alignment and stability. Weather conditions can considerably impact our work, as extreme temperatures affect concrete curing times and soil conditions. We’re frequently tasked with navigating property line disputes and guaranteeing accurate boundary measurements before beginning installation. In urban settings, we must work around existing structures, landscaping features, and tight spaces that limit equipment access. Material-specific challenges also arise, such as wood panels warping from moisture exposure, metal posts reacting to soil chemistry, or vinyl components expanding and contracting with temperature changes. An important factor in material selection is considering weather resistance to ensure the fence can withstand local environmental conditions. We’ve learned that successful fence installation requires a combination of technical knowledge, problem-solving skills, and experience with various materials and terrain types.
Local Codes and Permits
Fence contractors must navigate a complex web of local regulations and permit requirements before breaking ground on any installation project. We’ll need to research and comply with specific municipal codes that govern fence height, setback requirements, and materials allowed in different zoning areas. Most jurisdictions require detailed site plans and permit applications before we can begin work.
It’s essential to discuss fence responsibility with neighbors, especially if the fence lies on a shared property line, to ensure smooth project execution and shared costs.
Let’s consider these critical compliance elements that we must address:
- Property line verification through current surveys or documentation to guarantee we’re installing within legal boundaries and respecting easements
- HOA approval documentation when applicable, as many neighborhoods have specific design guidelines and architectural review processes
- Utility clearance confirmation through local dig-safe programs to prevent damage to underground services
We’ve found that permit fees and processing times vary profoundly between municipalities, so we’ll want to factor these into our project timeline and budget. It’s crucial to maintain proper documentation of all permits and approvals throughout the installation process. When we work together to secure necessary permissions upfront, we’ll avoid costly delays, potential fines, and the risk of having to remove or modify non-compliant installations.
Maintenance and Repair Services
Most fencing systems require periodic maintenance and occasional repairs to preserve their structural integrity and aesthetic appeal. We’ve found that regular upkeep prevents costly replacements and extends the life of your investment. Our maintenance services include pressure washing, rust removal, panel replacements, and protective coating applications tailored to your fence’s specific material. We’ll inspect your fence for common issues like loose posts, damaged hinges, rusted components, or warped boards. For wooden fences, we address rot, termite damage, and weathering through targeted repairs and protective treatments. Metal fences often need rust prevention and paint touch-ups, while vinyl fencing might require panel replacements or securing loose components. Our repair services cover everything from minor fixes to major structural repairs. We’ll realign sagging gates, replace broken pickets, repair storm damage, and reinforce weakened post foundations. If you’re experiencing issues with your electronic gate systems, we’ll diagnose and repair motor problems, replace worn components, and recalibrate automatic sensors. We recommend scheduling annual maintenance inspections to catch potential problems early and maintain your fence’s ideal condition. For severe issues like leaning fences, it might be necessary to consider a complete replacement to ensure long-term stability and compliance with HOA rules.
Frequently Asked Questions
How Long Does a Typical Fence Installation Project Take to Complete?
We’ll usually complete your fence installation in 1-2 days for a standard residential project. Larger properties or complex designs might take 3-5 days, depending on terrain and material choices.
What Are the Average Costs per Linear Foot for Different Fence Types?
Did you know 60% of homeowners choose chain-link as their budget option? We typically charge $15-25/ft for chain-link, $25-40/ft for wood, and $40-75/ft for vinyl or aluminum fencing.
Can Fencing Be Installed on Uneven or Sloped Terrain?
We can install fencing on sloped terrain using two methods: stepping, where panels follow the slope in a stair pattern, or racking, where panels angle parallel to the slope.
Will Underground Utilities Affect Where I Can Place My Fence Posts?
We’ll need to locate all underground utilities before digging posts. We’ll call 811 for free marking of gas, water, electric, and communication lines to guarantee safe, compliant fence installation.
How Far Should My Fence Be From My Neighbor’s Property Line?
Perfectly placing your fence means setting it at least 2-4 inches inside your property line. We recommend checking local zoning laws and discussing placement with your neighbors to maintain good relations.
Takeaway
We’ve shared our expertise in transforming ordinary property boundaries into lasting symbols of security and beauty. While some may view fence installation as a simple task of securing posts and panels, we recognize it’s an art that demands precision, knowledge, and dedication. By mastering these essential skills and staying current with industry standards, we’re committed to elevating the craft of fence installation for our valued clients.