Chainlink Fence Installation: Best Tips
When we’re looking to secure our property with a chainlink fence, we’ll need to understand more than just the basics of installation. While it might seem straightforward to set up metal posts and attach mesh fencing, proper installation requires careful planning, specific tools, and knowledge of local building codes. We’ve seen many DIY projects go awry due to poor preparation or overlooked details, leading to costly repairs down the line. Let’s explore how to get this project done right the first time, from initial measurements to final tension adjustments.
Key Points
- Chainlink Fence Installation requires proper planning, including site evaluation, permit acquisition, and marking post locations at 10-foot intervals.
- Essential tools include post hole digger, level, fence stretcher bar, and safety equipment like gloves and glasses.
- Posts must extend 36 inches into the ground with concrete footings, crowned to direct water away from posts.
- Average chainlink fence installation costs $12-25 per linear foot, including materials, labor, and additional features.
- Regular maintenance includes quarterly inspections, rust prevention, tightening loose components, and keeping fence lines clear of vegetation.
Planning Your Chainlink Fence Installation
Anyone planning to install a chainlink fence needs to start with thorough preparation and site evaluation. We’ll need to check local zoning laws, obtain necessary permits, and contact utility companies to mark underground lines before breaking ground.
Let’s measure the perimeter carefully, accounting for gates and corners. We’ll determine post spacing (typically 8-10 feet apart) and calculate materials needed: terminal posts, line posts, top rail, mesh fabric, tension wire, and hardware. Don’t forget to factor in slope adjustments if your terrain isn’t level.
We recommend sketching a detailed layout, marking post locations, and planning gate placements. Consider the chainlink fence installation height based on your needs – residential fences typically range from 4-6 feet, while commercial applications may require taller installations.
Choosing vinyl-coated materials provides enhanced durability and rust resistance while reducing long-term maintenance requirements.
Tools and Materials Needed
A successful chainlink fence installation requires both specialized and common tools to complete the job properly. We’ll need essential tools including a post hole digger, level, measuring tape, pliers, wire cutters, and a power drill.
For tensioning the fence, we’ll require a fence stretcher bar and tension bands. Don’t forget safety equipment like work gloves and safety glasses.
For materials, we’ll need terminal posts, line posts, top rail, tension wire, chainlink mesh fabric, and ties. The hardware list includes rail caps, tension bands, brace bands, rail ends, nuts, and bolts. We recommend purchasing extra materials to account for terrain variations and potential adjustments. Make sure to source rust-resistant galvanized or aluminum-coated materials for longevity in outdoor conditions.
High-security fencing is available in heights ranging from 4 to 12 feet to meet different security requirements.
Site Preparation and Layout
We’ll begin by accurately marking our property lines and survey points to guarantee the fence stays within legal boundaries.
Next, we’ll clear vegetation, remove obstacles, and level the ground along the entire fence line to create a stable foundation for installation.
Installing corner posts first gives us reliable anchor points that will guide the placement of our remaining line posts and establish proper fence tension.
Terminal posts provide essential stability and are critical anchor points for proper chain link fence construction.
Marking Property Lines Accurately
Before installing any chainlink fence components, proper marking of property lines guarantees legal compliance and prevents costly disputes with neighbors. We’ll need to obtain a recent property survey or have one conducted to establish exact boundaries. Let’s locate and verify all property pins using a metal detector and marking flags.
We’ll measure and mark the fence line using stakes and mason’s string, ensuring we’re well within our property boundaries. It’s essential to account for local setback requirements – typically 2-6 inches inside the property line. For precise alignment, we’ll use a transit level or laser level to establish consistent height references across sloped terrain.
Don’t forget to call 811 for utility marking services once we’ve established our fence line. This final step protects us from hitting underground services during post installation.
Clearing and Leveling Ground
Having confirmed property boundaries and utility locations, proper ground preparation now sets the foundation for a stable chainlink fence installation. We’ll need to clear the entire fence line of obstacles and create a level surface for ideal results.
Remove all vegetation, including grass, weeds, and small bushes, extending at least 12 inches on each side of the planned fence line
Grade the ground to eliminate high spots and fill low areas, guaranteeing no more than 2 inches of elevation change every 100 feet
Compact the soil using a plate compactor or hand tamper, paying special attention to areas where posts will be installed
We recommend renting a small excavator or power equipment for larger projects, though hand tools work well for shorter fence runs. Let’s guarantee our base is perfectly prepared before moving on to post installation.
Installing Corner Posts First
A successful chainlink fence installation starts with properly positioned corner posts that establish the fence’s primary framework and overall alignment. We’ll dig post holes at each corner to a depth of at least 24 inches, or below the frost line in colder climates. For stability, we’re making the holes three times wider than the post diameter.
Let’s set each corner post in concrete, using a post level to guarantee they’re perfectly plumb. We’ll brace the posts temporarily with 2x4s while the concrete cures. Remember to position the posts with the flat sides facing the direction of the fence runs.
Once we’ve confirmed our measurements and allowed the concrete to set for 24 hours, we’re ready to install the remaining posts and begin the next phase of construction.
Setting Fence Posts
Once excavation is complete, setting your fence posts properly becomes the most critical step in chainlink fence installation. We’ll mix concrete according to manufacturer specifications and pour it around each post, ensuring they remain plumb throughout the process.
- Each post must be set at exactly 10 feet apart, measured center to center, using a measuring tape and string line for precision
- Posts should extend 36 inches into the ground for residential applications, with additional depth required for areas with frost heave
- Concrete must be crowned around each post base to direct water away from the metal
While the concrete cures, we’ll use temporary bracing to maintain perfect alignment. Remember to check post levels frequently during the initial setting period, as any slight lean now will cause significant issues later during tension application.
Using galvanized steel posts helps ensure long-term durability and resistance to rust and corrosion.
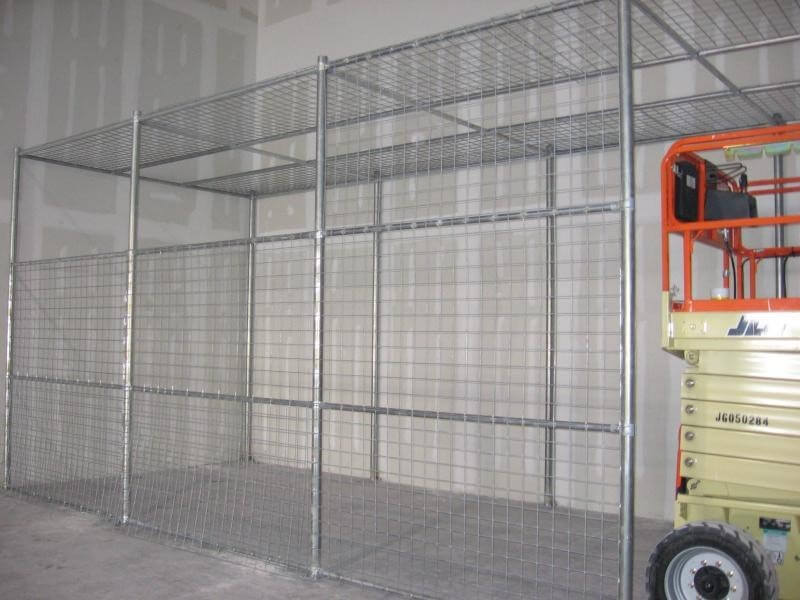
Installing Rails and Mesh
We’ll mount the top support rails by connecting them to the terminal posts using specialized rail caps and bands, ensuring proper tension and alignment.
Next, we’ll unroll the chain-link mesh along the fence line and secure it temporarily to the terminal post using tension bars and bands.
Finally, we’ll stretch the mesh tight using a fence stretcher tool, attaching it to each line post with tie wires while maintaining consistent spacing and proper height.
For commercial applications, the standard 2-inch diamond mesh is woven from 9-gauge galvanized wire for maximum durability.
Attaching Top Support Rails
Top support rails provide essential stability and structure to your chainlink fence installation. We’ll secure these horizontal members to create a sturdy framework that prevents sagging and maintains proper tension throughout the fence line.
- Position each top rail section through the post caps, ensuring they slide smoothly into the loop caps
- Connect adjacent rail sections using rail sleeves, offsetting the joints from post locations for maximum strength
- Secure all connections with self-tapping screws, placing them at the bottom of each sleeve
When joining rails at corner posts, we’ll cut them at 45-degree angles for a clean fit. Remember to leave a 1/4-inch gap between rail sections to allow for thermal expansion and contraction. This step creates the final structural support needed before tensioning the mesh.
Securing Wire Mesh Panels
After completing the top rail installation, the next essential phase involves securing the chainlink mesh panels along your fence line. We’ll start at a terminal post, unrolling the mesh while keeping it taut. Let’s secure the mesh to the post using tension bands, spacing them approximately 15 inches apart.
As we work down the fence line, we’ll use fence ties to attach the mesh to the top rail and line posts. We’ll space these ties about 24 inches apart on the rail and 12 inches apart on the posts. For proper tensioning, we’ll use a fence stretcher bar to pull the mesh tight before securing it to each terminal post. This guarantees your fence maintains its structural integrity and professional appearance while preventing sagging or loose sections.
Maintenance and Repairs
Regular maintenance of your chainlink fence will substantially extend its lifespan and prevent costly repairs. We recommend inspecting your fence quarterly for rust spots, loose ties, and damaged posts. When you spot rust, wire brush the affected areas and apply a zinc-rich primer followed by exterior paint.
Keep your fence line clear of vegetation and trim back branches that could damage the mesh. We’ve found that tightening loose tension bands and tie wires immediately prevents fence sagging.
If your gate starts dragging, adjust the hinges and guarantee the post remains plumb.
For major repairs like bent posts or torn mesh, it’s best to replace the damaged sections promptly. Remember to check your chainlink fence after storms for debris impact and address any issues before they worsen.
Consider using tension bands and appropriate fittings when replacing damaged sections to ensure proper stability and alignment.
Frequently Asked Questions
Can Chainlink Fencing Keep Small Pets Like Rabbits From Digging Underneath?
We recommend installing tension wire and burying the fence 12-18 inches deep to prevent rabbits from digging. For extra protection, we’ll add a curved section at ground level facing outward.
Is Chainlink Fencing Legal for Swimming Pool Enclosures in Residential Areas?
We recommend checking local codes, but chainlink fencing typically meets pool barrier requirements when it’s at least 4 feet tall, rust-resistant, and has openings smaller than 2-1/4 inches.
How Does Chainlink Fencing Perform in Areas With Heavy Snowfall?
We recommend galvanized chainlink for snowy regions as it withstands snow loads well. The open mesh prevents drift buildup, while proper tension and strong posts guarantee stability during winter conditions.
Can I Install Decorative Slats in My Existing Chainlink Fence?
Yes, we’ll help you add slats to your existing fence. They’ll slide vertically through the mesh diamonds, and we recommend measuring your fence height first to order properly-sized slats.
Does Chainlink Fencing Interfere With Wi-Fi or Cellular Signals?
We’re happy to confirm that chainlink fencing won’t interfere with your Wi-Fi or cellular signals. The open mesh design and metallic wire spacing allow electromagnetic waves to pass through freely.
Takeaway
We’ve covered the essentials of chainlink fence installation, from initial planning to ongoing maintenance. By following proper post-setting techniques, maintaining precise tension on the mesh, and conducting regular inspections, you’ll guarantee your fence’s durability. While costs vary by project scope, investing in quality materials and professional installation when needed will maximize your fence’s lifespan. Remember to check local regulations and maintain proper drainage for optimal performance.